

When Linda joined our CODAME - LED RIBBON - FASHION TECH workshop on May 12th, she came with a few possible items to upcycle: a reflective bag, and some leather pieces. When Anina came around to her to talk about what Linda wanted to do, she thought it was not possible to make an LED Ribbon Bag because she did not know how to make the letters.
Anina helped her to think through the idea and break down the construction steps to integrate the LED Ribbon. The steps Anina advised were:
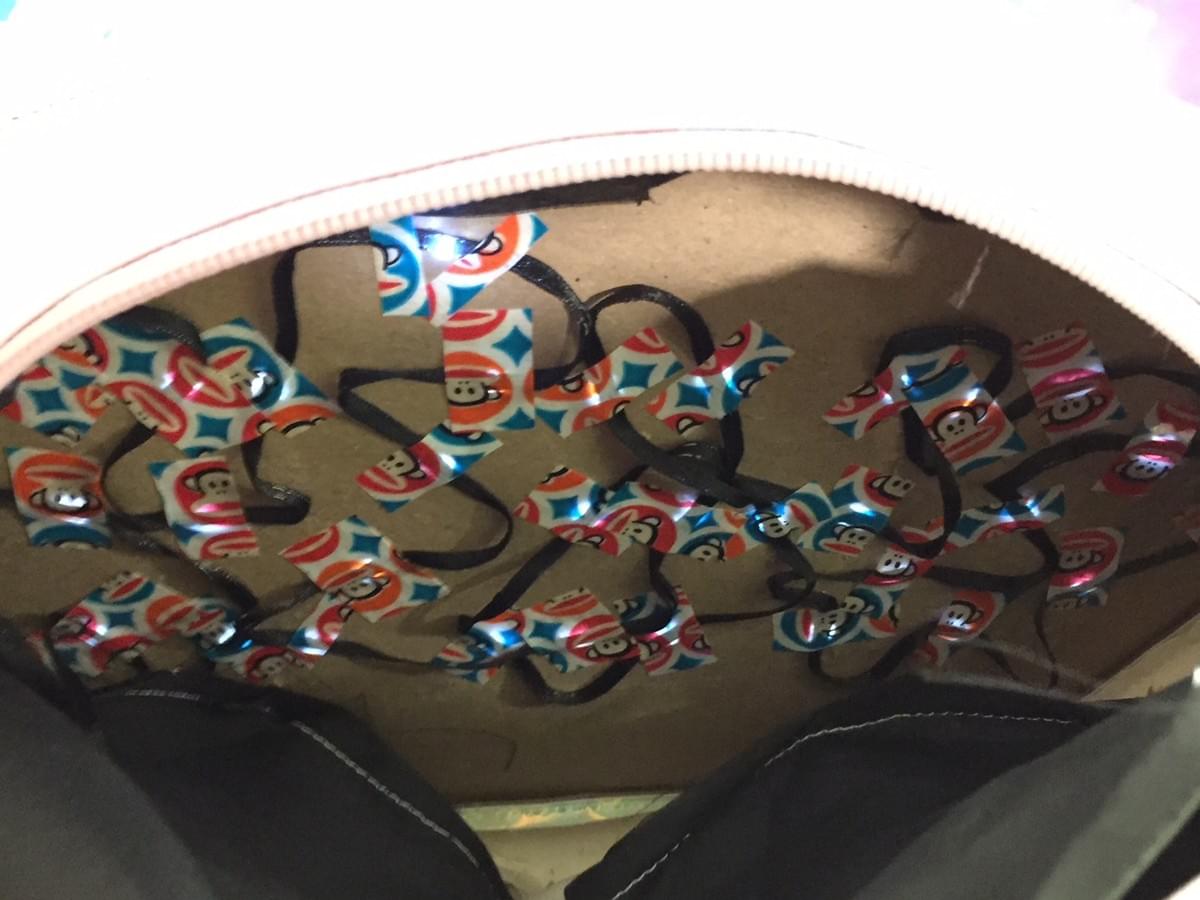
1. Open the lining with the ripper tool in order to get to the back of the bag panel
2. Write out the word on the tracing paper and think about where to put the LED "dots" to spell the word
--->Write the word on some materials backwards
--->Using the LED Ribbon, map out the word "dots" to make sure you have enough "dots" to create the word
--->This is called "mapping the technology"

3. Tape the tracing paper to the front of the bag with the LED holes marked
4. Using a soldering iron, burn holes all the way to the back of the bag's panel, holding the lining away (so it doesn't get burned).
5. Using a sharp knife or exacto knife, cut off any extra material that would prevent the LED Ribbon from laying flat against the panel.
6. Using Duct Tape piece, tape the LED Ribbon to the back of the bag panel.
--->Check that the LED Ribbon and LEDs are visible by turning on the LED Ribbon
--->Anina always recommends working with the LED Ribbon turned ON so that you can see if you have done anything to interrupt the electrical connection (and the light turns off). You can then backtrack easier.
7. Using Duct Tape, fully tape the whole panel. This is to strengthen the connection between the LED Ribbon and the back of the bag panel.
8. Cut a small hole in the lining to thread the LED Ribbon through.
9. Disconnect the controller from the LED Ribbon and thread the LED Ribbon through to the inside of the bag through the lining.
--->It is good to leave 5cm of the LED Ribbon free to pull out the controller so that it's comfortable to change the batteries.
10. Hot glue or sewing a pocket for the LED Ribbon controller that is facing up.
11. Using the hot glue gun, hot glue the lining to the bag back panel to close it.
12. Insert the LED Ribbon into the controller (see video by Rose Soma) and check that it is correctly connected/turning on.
13. Insert the LED Ribbon controller into the pocket.
14. On the front of the bag, use small pieces of fabric to connect the LED "dots" so that it is easy to understand the word you have written.
15. Any problems please write to us in our forum!